In this tutorial, you will learn how to restore backups using JetBackup 5 interface in cPanel.
What is JetBackup? #
JetBackup is a tool available in your cPanel which provides a powerful set of backup and recovery solutions.
Our systems have been fully automated to create remote (off-site) backups for you, making this process super easy! We take daily off-site backups (around midnight) of your data and store them up to a certain number of days, based on your hosting plan.
JetBackup is a feature GetHost has added into your cPanel at no extra cost for our Shared Hosting and WordPress Hosting plans.
How to Download or Restore Full Account Backups #
Restoring a Full Account Backup #
Step 1: Log in to your cPanel.

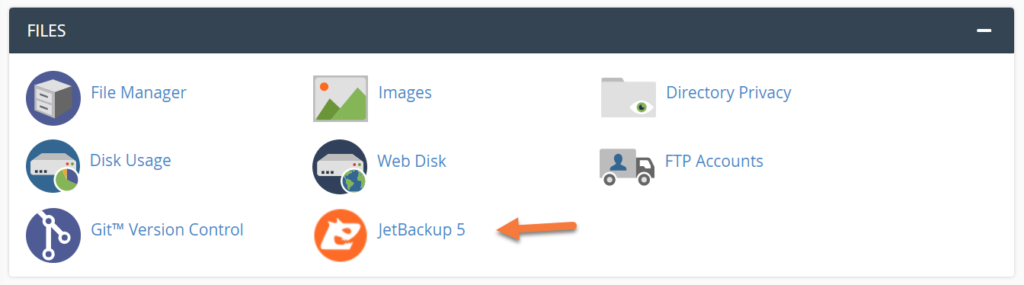
Step 2: Once you’ve logged in, scroll down through your cPanel and find the Files section, then open JetBackup 5.
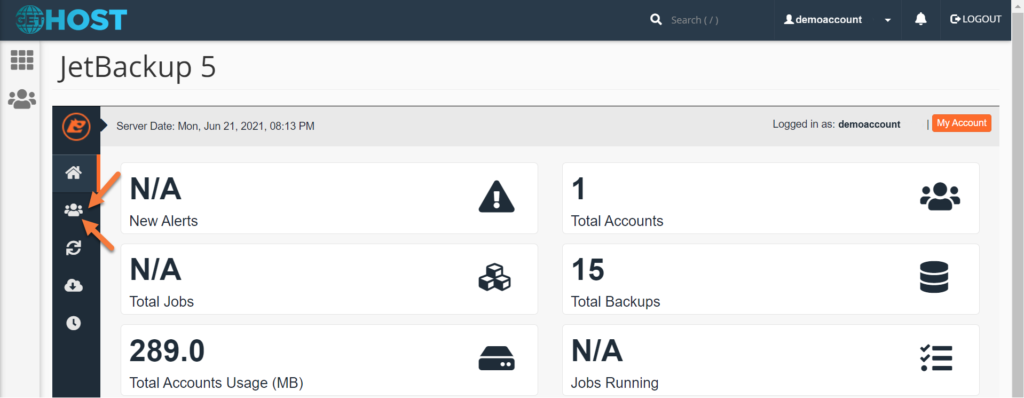
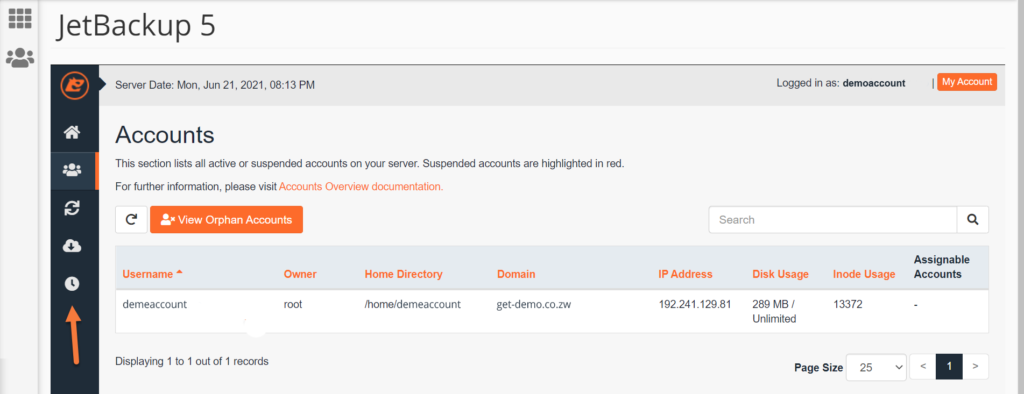
Step 3: Once Jetbackup 5 opens, click the accounts icon on the left side.
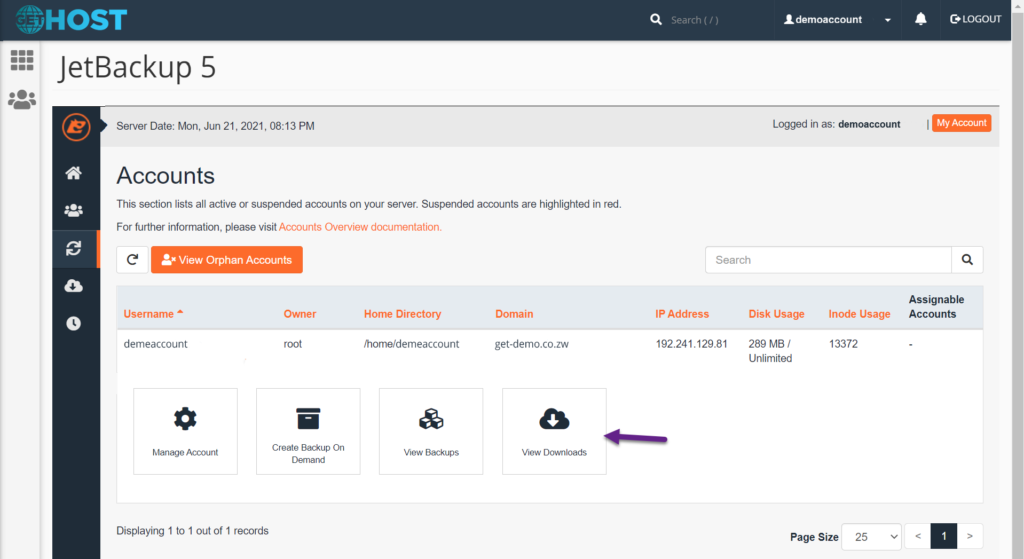
Step 4: Once the Accounts list loads, find the cPanel account you want to restore and click on it to open the restore window.
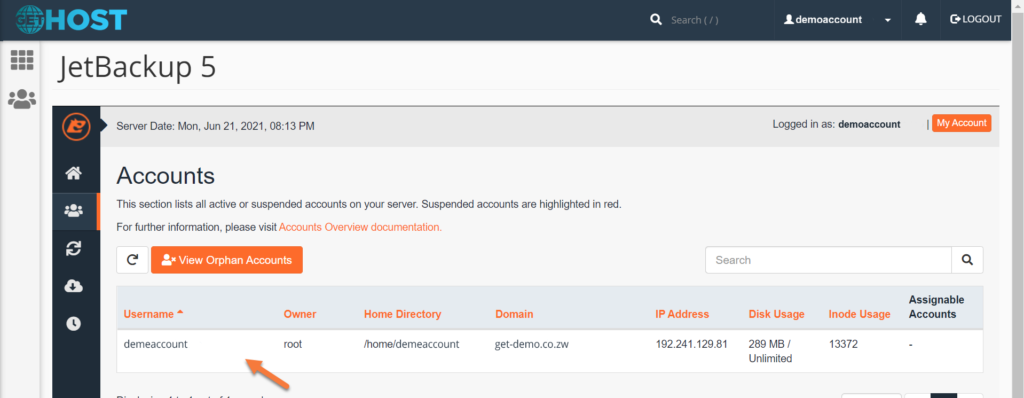
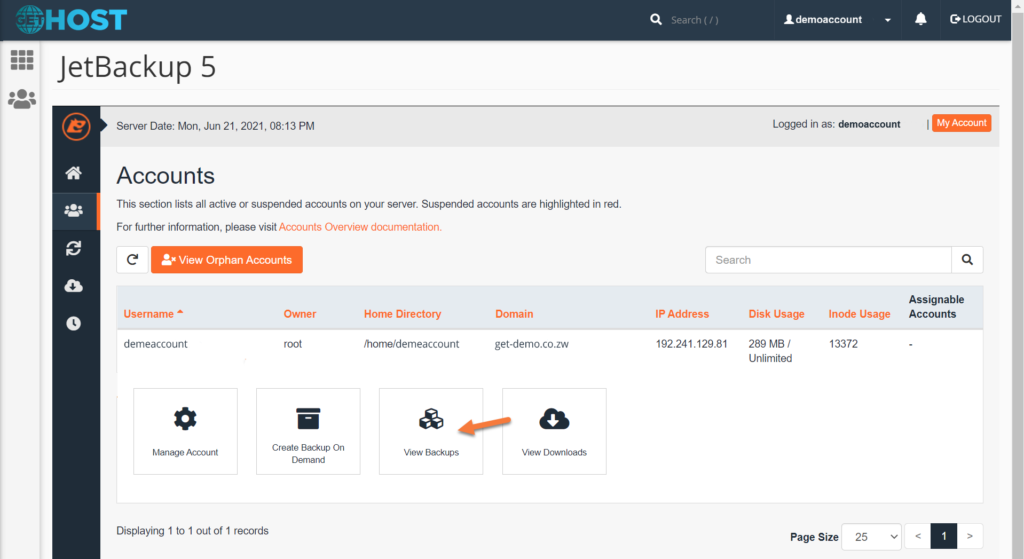
A dialog will expand from the bottom of the account row. Click “View Backups” to proceed.
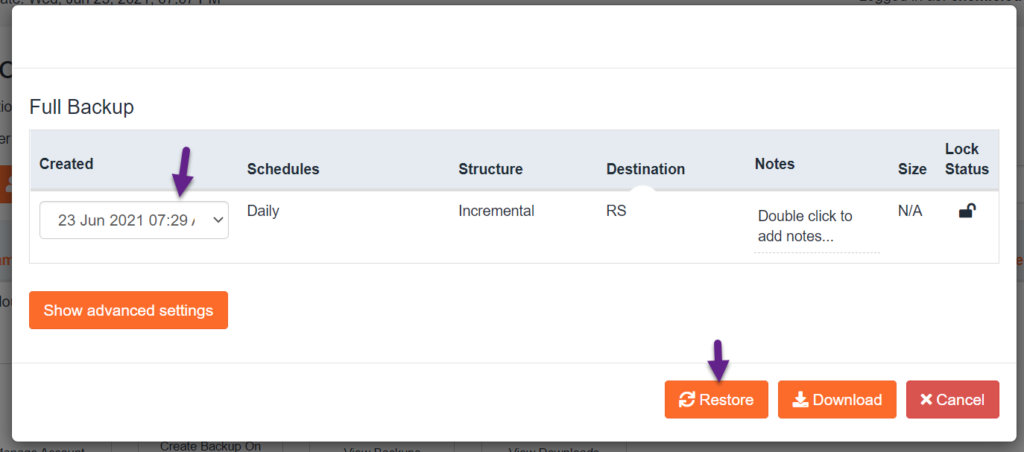
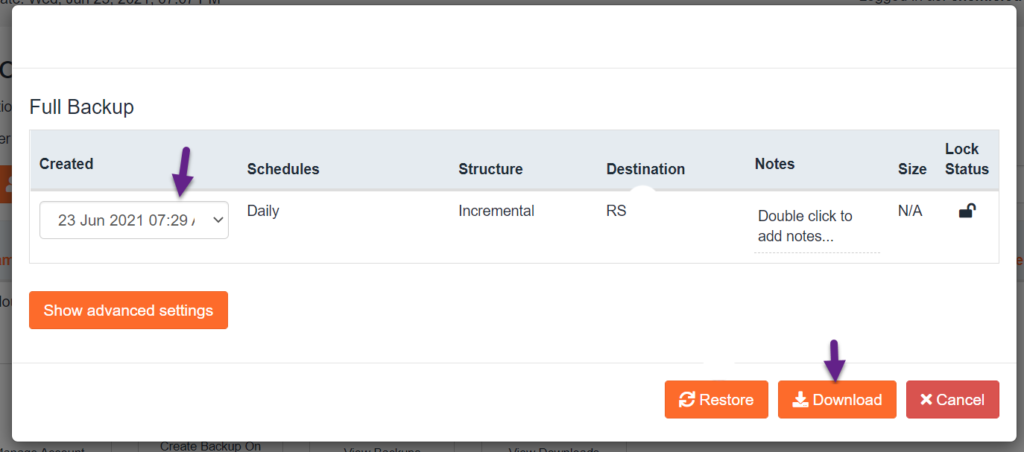
Step 5: The Backups modal will open. Choose the backup date you want to restore from the drop-down menu beneath the Created column.
Then click Restore.
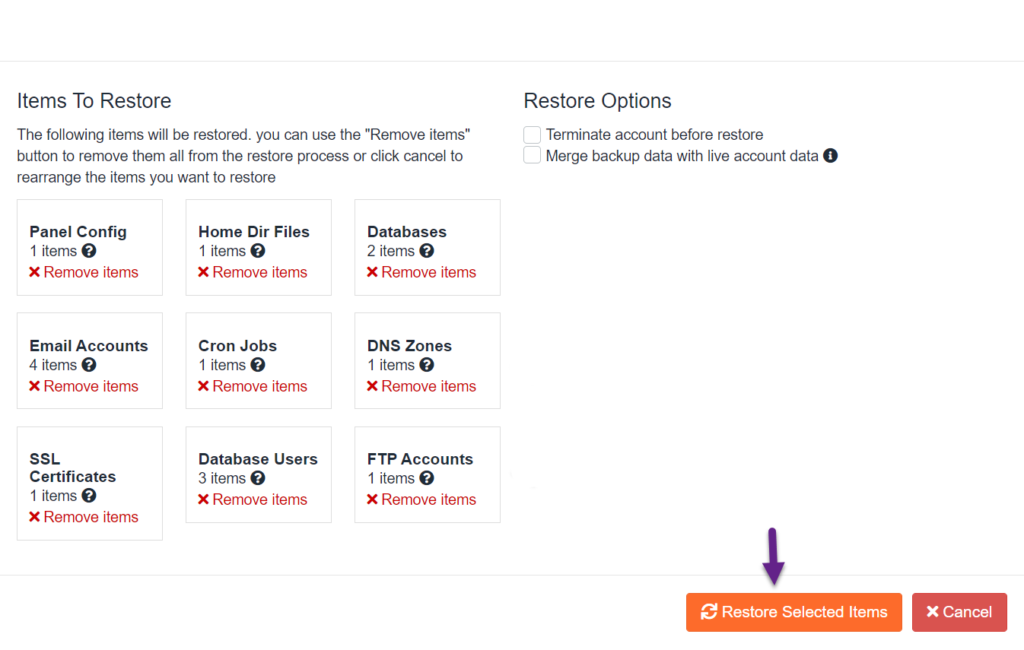
Step 6: You will be presented with a list of Items To Restore. To restore everything that is part of a cPanel Account, leave all of these selected, then click Restore Selected Items.
Step 7: The selected account will be queued for restoration. You will see a success notification in the top right corner.
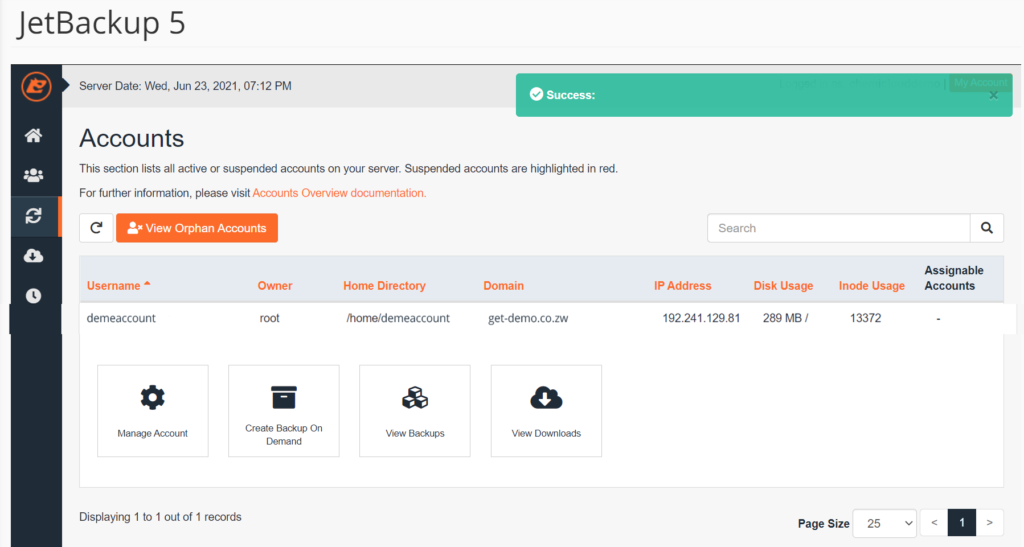
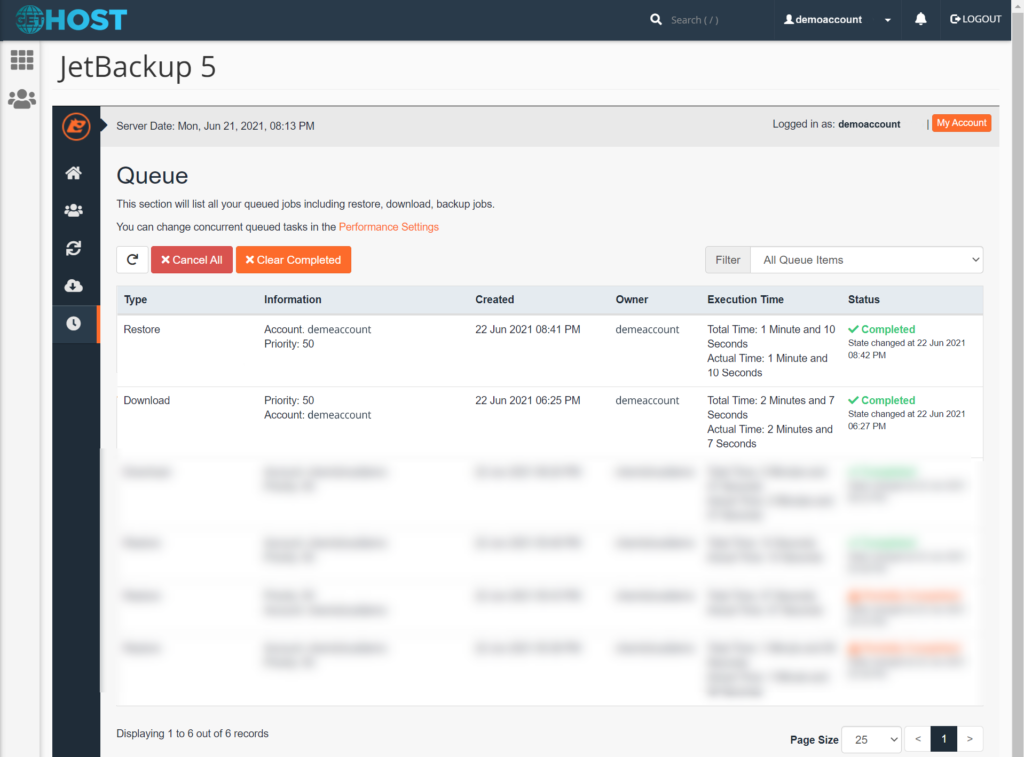
However, unlike a Download, a Restore takes place behind the scenes. To check the status of the Restore, you’ll need to open the Queue. Click the Queue icon which is the last icon from the row of tools on the left side.
Step 8: Once the Queue is open, you will see a list of tasks. As you can see from the list below, the Restore I requested in the previous step has already been completed.
Downloading a Full Account Backup #
Step 1: Step 1: Log in to your cPanel.
Step 2: Once you’ve logged in, scroll down through your cPanel and find the Files section, then open JetBackup 5.
Step 3: Once Jetbackup 5 opens, click the accounts icon on the left side.
Step 4: Once the Accounts list loads, find the cPanel account you want to restore and click on it to open the restore window.
A dialog will expand from the bottom of the account row. Click “View Backups” to proceed.
Step 5: The Backups modal will open. Choose the date of the backup you want to download from the drop-down menu, then click Download.
After clicking download, you will be presented with a list of Items to Download.
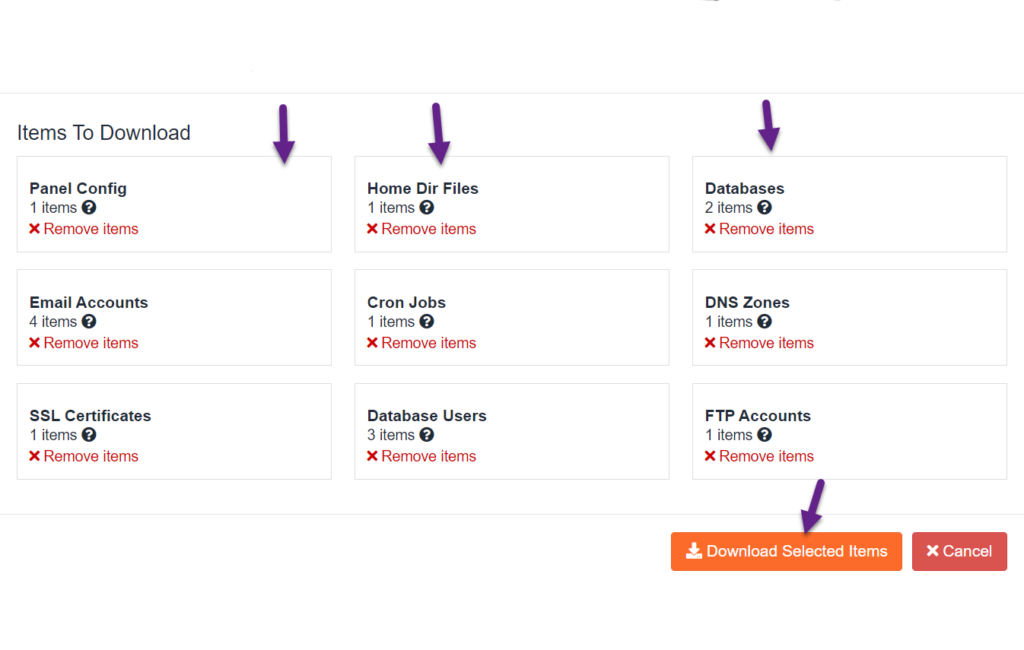
Be sure to leave all of these items checked, then click the Download Selected Items button.
You will be redirected to the Accounts page where you see a green success banner appear in the top right corner.
Step 6: To access your downloads, click the View Downloads button on the Accounts screen.
After clicking View Downloads, a modal window will open with your downloads available.

Just look for the download you want to save to your computer and click the Download button. The file will be saved to your computer.
We hope you find this article useful. Discover more about GetHost – the best Hosting Solutions for personal and business websites!


